
As an Amazon Associate, I earn from qualifying purchases.
Making baby food at home sounds intimidating until you do it once. Then it starts to feel like one of the simplest healthy habits in your kitchen.
A food processor can help you turn everyday ingredients into smooth, baby-friendly purees in minutes. You do not need a complicated setup, expensive gear, or gourmet skills. What you do need is a clean routine, a few good starter foods, and a clear idea of how thick, smooth, and fresh baby food should be.
For parents who want more control over ingredients, fewer additives, and a practical way to prep small portions, this method works well. It is also one of the easiest ways to make fresh purees without spending extra on jars or pouches every week.
This guide will show you exactly how to use a food processor to make baby food safely at home, what foods work best, how to get the texture right, how to store purees properly, and what mistakes to avoid.
Quick answer for busy parents
Yes, you can absolutely use a food processor to make baby food. Most babies are ready for solid foods at about 6 months, and smooth mashed or pureed foods are often easiest at first. As eating skills improve, you can move toward thicker and lumpier textures. Homemade baby food should be stored carefully, and freshly made homemade baby foods generally keep for 1 to 2 days in the refrigerator and 1 to 2 months in the freezer.
Why a food processor is a smart choice for homemade baby food
A food processor is one of the most practical tools for parents because it makes batch prep easy without locking you into huge quantities. You can prepare one vegetable, one fruit, or a simple combination, then pulse until the texture matches your baby’s stage.
It also gives you better control than store-bought baby food in a few key ways. You decide what goes in. You decide how smooth or thick it should be. You decide whether to make two servings or twelve. That flexibility matters when your baby is just starting solids and you are still figuring out what they like.
Another advantage is speed. Steam, soften, blend, portion, chill. That is the basic cycle. Once you do it a few times, the routine becomes simple enough for a weeknight.
When babies are usually ready for purees
Most babies can start eating foods other than breast milk or infant formula at about 6 months. Introducing foods before 4 months is not recommended. Helpful readiness signs include sitting up alone or with support, controlling the head and neck, opening the mouth when food is offered, and swallowing food instead of pushing it back out.
At first, it is usually easier for babies to handle very smooth purees or mashed foods. As they get more comfortable, you can gradually move to thicker textures and then soft, small pieces. That progression matters because babies do not stay at the puree stage for long.
What you need before you start
You do not need a professional kitchen. Most parents can get started with:
- a food processor
- a pot or steamer basket
- a knife and cutting board
- a spoon or silicone spatula
- freezer trays or small airtight containers
- labels or masking tape for dates
Before making anything, wash your hands, wash produce, and make sure the food processor bowl, blade, lid, and prep surfaces are clean. Safe food handling matters because babies and young children are more vulnerable to foodborne illness.
The best first foods to puree in a food processor
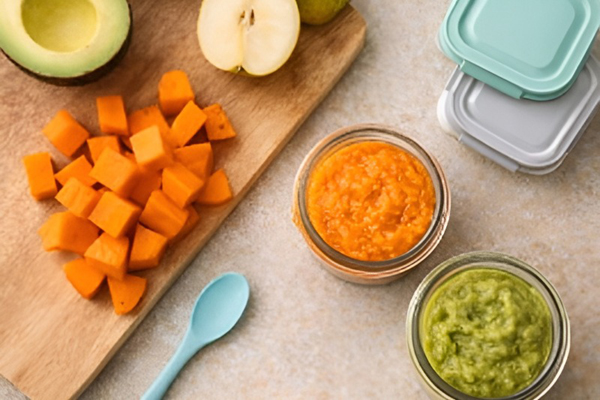
If you want the easiest start, pick foods that blend smoothly and have a mild taste. Good beginner options include sweet potatoes, carrots, peas, apples, pears, bananas, avocado, pumpkin, butternut squash, oats, lentils, and well-cooked beans.
There is no single perfect order for introducing foods. What matters more is choosing foods your baby can safely handle and introducing new foods one at a time so you can watch for any reaction. AAP guidance also notes that which baby foods you start first is not important.
Step by step: how to use a food processor to make baby food
1. Start with one simple ingredient
Your first batches should be boring on purpose. That is a good thing. Try one ingredient like steamed sweet potato, soft pear, peas, or carrots. Single-ingredient purees are easier for babies and easier for parents to track.
2. Wash, peel, and prep
Clean the produce, peel when needed, remove seeds or pits, and cut it into small chunks so it cooks evenly. Smaller pieces soften faster and blend more smoothly.
3. Cook until soft
Most fruits and vegetables need to be softened before pureeing. Steaming is often the best method because it keeps the food soft without drowning it in water. Boiling also works, but drain it well afterward so your puree does not turn watery.
Banana and avocado are exceptions that usually mash or blend well without cooking.
4. Let it cool slightly
Do not put piping-hot food straight into the processor. Let it cool just enough to handle safely. Warm food blends well, but scorching hot food is messy and risky.
5. Add to the food processor
Place the cooked food in the bowl. Start with a modest amount, especially in the beginning. Small batches help you learn how much liquid your machine needs and how smooth the texture becomes.
6. Add a little liquid
To get the blades moving, add a small splash of water. Some parents also use breast milk or prepared infant formula depending on their feeding routine. Start with less than you think you need. You can always add more, but you cannot easily fix a puree that turns into soup.
7. Pulse, scrape, and blend again
Pulse first. Then stop and scrape down the sides. Blend again until the texture looks smooth and spoonable. This is where the food processor really shines. You can stop early for a thicker mash or keep going for a silkier puree.
8. Test the texture
The best beginner puree is smooth, soft, and thick enough to stay on a spoon. It should not be runny like broth. As your baby develops eating skills, you can make the texture thicker and more textured. The CDC notes that you can introduce thicker and more lumpy foods as your baby’s ability to eat develops.
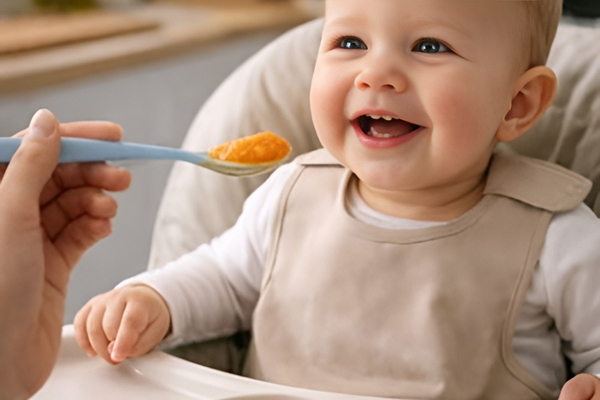
9. Portion and serve
Start with a small amount. The CDC suggests beginning with 1 to 2 tablespoons and then watching your child’s hunger and fullness cues. Solid foods are introduced gradually and do not instantly replace breast milk or infant formula.
How to fix common baby puree problems
One thing that makes homemade baby food frustrating is not knowing how to fix texture issues. Here is the simple version.
If the puree is too thick, add a spoonful of water and blend again.
If the puree is too thin, add more cooked food and pulse again.
If the puree looks grainy, it probably needs more blending time or softer cooking.
If the puree tastes bland to you, that is fine. Baby food does not need salt, sugar, or seasoning. In fact, fresh baby foods should be prepared plainly, without added salt.
If your baby refuses one food, do not assume they hate it forever. Babies often need repeated exposure to new tastes and textures.
Easy first puree ideas parents actually use
These combinations are simple, practical, and easy to prep in a food processor:
Single-ingredient starters
- steamed sweet potato
- steamed carrots
- peas
- pear
- apple
- banana
- avocado
Simple combo ideas after individual foods go well
- pear and oats
- apple and sweet potato
- peas and potato
- butternut squash and carrot
- lentils and sweet potato
The goal is not to make gourmet recipes. The goal is to build confidence, keep ingredients simple, and learn what textures your baby handles best.
Foods and drinks to avoid in early baby food
A few rules matter here. Babies younger than 12 months should not have honey because of the risk of botulism. Juice is not recommended before 12 months. Unpasteurized foods and drinks should be avoided. Drinking cow’s milk is also not recommended before 12 months, although yogurt and cheese may be introduced earlier depending on the child and the family’s pediatric guidance.
You also need to think about choking hazards. Foods served whole, uncooked, or in certain shapes can be risky. The CDC warns that preparation matters, and cutting foods into smaller pieces or mashing them can help prevent choking. Whole grapes, nuts, chunks of meat or cheese, raw hard vegetables, popcorn, and thick globs of nut butter are examples of foods that need caution or delay depending on age and texture readiness.
Safe storage rules every parent should know
This is where many homemade baby food articles stay too vague. You should not be vague about storage.
Freshly made homemade baby foods generally keep for 1 to 2 days in the refrigerator and 1 to 2 months in the freezer, according to FoodSafety.gov’s storage chart. Some specific strained fruits and vegetables may last longer in the freezer, but for homemade mixed baby food, the more cautious rule is better and easier to follow.
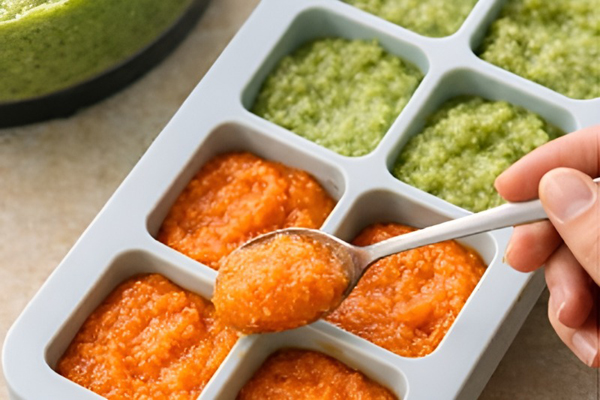
The easiest storage method is this:
Blend the food, spoon it into ice cube trays or small containers, label the date, refrigerate what you will use soon, and freeze the rest.
Small portions reduce waste. They also make thawing easier because you can pull just what you need instead of defrosting a large container.
One more important habit: do not feed directly from the storage container and then return leftovers to the fridge. Once a spoon has touched your baby’s mouth, the remaining food should not go back into long-term storage. FDA guidance also advises serving food in a bowl, not straight from the jar, and discarding leftovers from the dish after a meal.
Reheating homemade baby food the right way
Thaw frozen portions in the refrigerator when you can. Warm them gently until just lukewarm. Stir well and test the temperature before serving.
Avoid overheating. Hot spots can happen, especially in microwaved foods. Keeping portions small makes reheating more even and more manageable.
A simple one-hour baby food prep workflow
If you want this to feel realistic, use a short weekly workflow:
First 10 minutes: wash, peel, chop
Next 15 to 20 minutes: steam or boil two to three easy ingredients
Next 10 minutes: blend each ingredient separately
Next 10 minutes: label and portion into trays or containers
Final few minutes: clean the processor and prep area
That is enough to make several small servings without turning your kitchen upside down.
Why this article’s method works better for real parents
A lot of guides either overcomplicate homemade baby food or make it sound like every puree has to be perfect. Neither approach helps.
The practical version is better. Start with simple ingredients. Cook until soft. Blend in small batches. Store safely. Watch your baby’s cues. Adjust texture over time. Ask your pediatrician if you have concerns about allergies, readiness, or feeding progress.
That is what actually works in a busy home.
Final thoughts
Learning how to use a food processor to make baby food safely at home is less about becoming a perfect parent and more about building a simple routine you can repeat.
You do not need fancy recipes. You do not need a pantry full of special ingredients. You need a few safe starter foods, a clean food processor, and enough confidence to begin.
Start small. Keep it simple. Make one or two purees your baby can practice with this week. Then build from there.
If you want a healthy kitchen habit that saves money, gives you more control over ingredients, and makes feeding feel more manageable, homemade baby food is one of the easiest places to start.
FAQ
Can I use a food processor instead of a blender for baby food?
Yes. A food processor works well for homemade baby food, especially for batch prep and texture control. AAP guidance notes that fresh baby foods can be prepared with a blender, food processor, or by mashing soft foods.
What is the best first food to puree for a baby?
There is no single required first food. Parents often start with soft foods like sweet potato, pear, peas, banana, or avocado. The AAP notes that the order of starting baby foods is not important.
How smooth should homemade baby food be?
At first, very smooth purees are often easiest. As your baby develops eating skills, you can move toward thicker and lumpier textures.
How long does homemade baby food last in the fridge?
FoodSafety.gov says homemade baby foods generally keep for 1 to 2 days in the refrigerator.
Can I freeze homemade baby food in ice cube trays?
Yes. Small portions are practical for freezing and thawing. Homemade baby foods generally keep for 1 to 2 months in the freezer under FoodSafety.gov guidance.
Is honey safe in homemade baby food?
No. Babies younger than 12 months should not have honey.
As an Amazon Associate, I earn from qualifying purchases.